Welcome to violet-cat-415996.hostingersite.com, In this article, we will see how to Detect Eyes and Detect Faces in Python using the very famous library OpenCV. So, Hello Readers, you probably have gone through many authentication phases which detect your face, mostly for security reasons. In smartphones also, we find the Face Detection feature which detects the faces automatically while clicking or editing or for lock purposes. CCTV’s, 3D trail applications, etc also detects the faces to give their services.
The machine doesn’t understand what Human is what Face is, but the Maker of the Machine does! And hence the algorithms and models work fine with the machines to make them a sense of Humans and Animals, Cats and Dogs, Houses and Buildings, etc. This is a type of Artificial Intelligence!
Well, these algorithms are thereby implemented into code in different programming languages and are used in so many intelligent gadgets.
And yes, our Python, highly supporting AI and ML, has a strong open-source library, OpenCV which provides powerful support in Image Processing, Machine Learning and Computer Vision, where CV being standing for ‘Computer Vision’.
In this article, let’s write actual code for ‘Face Detection using this very exquisite ‘OpenCV’ and Python step by step:

What is OpenCV?
OpenCV is a real-time computer vision and machine learning software library, containing more than 2500 CV and ML algorithms. These algorithms can be used to detect and recognize faces, identify objects, classify human actions in videos, track camera movements, track moving objects, extract 3D models of objects, produce 3D point clouds from stereo cameras, stitch images together to produce a high-resolution image of an entire scene, find similar images from an image database, remove red eyes from images taken using flash, follow eye movements, recognize scenery and establish markers to overlay it with augmented reality, etc.
OpenCV is not only supported by Python but also by C++, Java, MATLAB in Windows, Linux, Mac OS, and Android as well!
OpenCV for Python
OpenCV in Python uses Numpy. Numpy is a highly optimized library for numerical calculations and provides powerful functionalities including arrays. All the OpenCV array structures are converted to and from Numpy arrays.
Let’s install OpenCV and proceed ahead with our code:
Installing OpenCV
Open your terminal and put the following code for installation:
For Windows:
pip install opencv-pythonFor Linux:
pip3 install opencv-pythonAnaconda Environment:
conda install -c menpo opencvLet’s use some of its functionalities provided by OpenCV and thereby proceed step by step with our code:
Let’s import OpenCV.
import cv2
import numpy as np
Yes, though, the library is named OpenCV but actually, it has to import the cv2 module.
As we discussed earlier, OpenCV uses Numpy for its effectiveness. Now what that actually means is, Numpy has strong array support. Numpy arrays have an interesting and wide range of methods.
And why we are discussing this? Because Every image used with OpenCV is nothing but a 3-dimensional Numpy Array!
This 3-dimensional Numpy array contains BGR values ranging from 0-255, where B stands for Blue, G for Green, R stands for Red. This value shows the BGR pixel value in an image.
Let’s make the above things practical:
Let’s import our image, i.e. make our program read the sample image.
img = cv2.imread("image1.jpg", -1)imread() takes two parameters:
1. path for the image and
2. way in which image has to be read -> its default value is cv2.IMREAD_COLOR i.e. 1 and the other two options available are cv2.IMREAD_GRAYSCALE which reads the image in gray mode n takes 0 as value and cv2.IMREAD_UNCHANGED reads as it is and takes the value as -1.
Now, to display the output we have to fire command.
cv2.imshow('Image', img)
cv2.waitKey(0)
cv2.destroyAllWindows()
imshow() is used to show the read image and takes two parameters: 1. window-name and 2. image to be returned
cv2.waitKey() specifies the total time duration of the display. If passed 0, it will showcase the output till any key is hit. It takes parameters as time in milliseconds. The function is very important as it avoids the Python kernel from crashing.
cv2.destroyAllWindows() closes all the open windows.
Now that our code is complete, let’s check for the output:

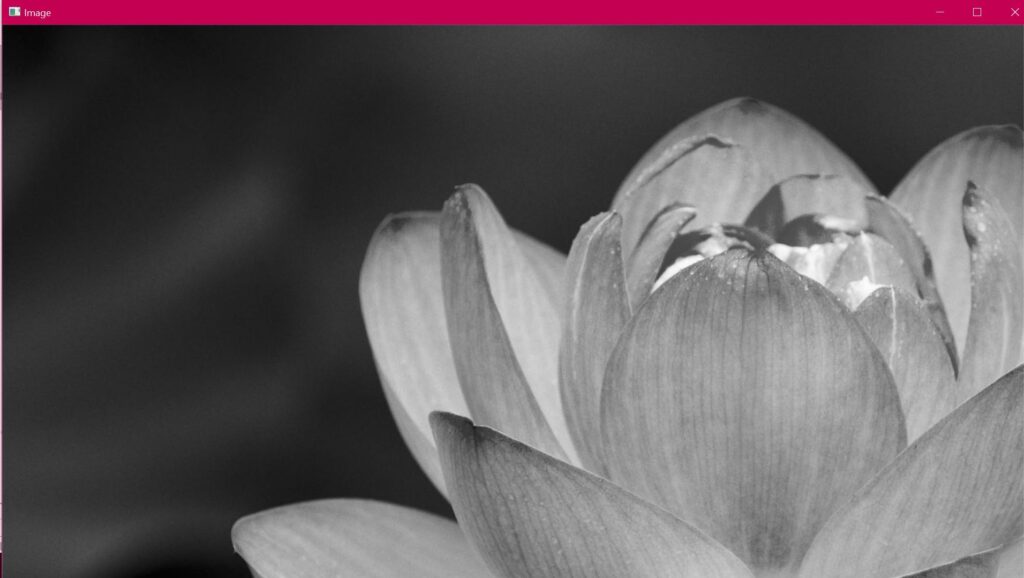
Now, let’s display in grayscale by changing the parametric value to 0 in imread()
img = cv2.imread("image1.jpg", 0)
Output:
By pressing any key on the keyboard, the window will automatically close.
Now, that the image displayed here, is too big we can actually resize it.
img = cv2.resize(img, (300,300))
Here, cv2.resize() provides the ability to convert the image to the desired shape. Now, instead of providing the width and height of the image you can actually provide fx and fy to denote how many times you have to scale the original image.
img = cv2.resize(img, (0,0), fx=0.3, fy=0.3)fx and fy denotes x and y parameters for scalability.
Output:

As we discussed earlier, these images are NumPy arrays. So let’s print the image and let’s see the output:
print(img)
print(img.shape) #returns shape of numpy array
Output:

From the output, it is very clear that the array is a 2d array with 424×424 pixels. Why 2d not 3d? Because the image has been read in grayscale, let’s make the compiler read the image unchanged and check for the shape.
img = cv2.imread('Image.jpg', -1)
img = cv2.resize(img, (0,0), fx=0.3, fy=0.3)
print(img)
print(img.shape)
Now you can see 3d array here with BGR values of each pixel.
The highlighted part is nothing but img.shape() which gives us the total count of dimensions present in the image.
You can actually play around with the array methods and thereby with the image. Not just with the image, cv2 can also read video files.
Let’s jump into our main program:
Detect Eyes and Detect Faces in Python
OpenCV also provides a facility to capture and record videos.
cap = cv2.VideoCapture(0)VideoCapture() takes parameter as the id of the camera through which the object has to capture. Here 0 stands for first camera or primary/main camera, if your system has a lot of cameras, you can specify their number as 1, 2, 3, etc, depends on which the number of cameras you want to turn on.
Now, as the cap variable is storing all the frames that have been captured, it is important to set an infinite loop and wait for the keypress by the user to break the loop or close the camera. Also, it’s important to read the frame and showcase it using imshow().
cap = cv2.VideoCapture(0)

while True:
    ret, frame = cap.read()
    cv2.imshow('Frame', frame)
    if(cv2.waitKey(1) == ord('e')):
        break
cap.release()
cap.destroyAllWindows()
cap.read() returns the frame captured and flag that specifies everything is working error-free.
The camera must be released so that other applications can use it if it’s required, hence cap.release().
To break the loop, i.e. to close the window/camera, it’s important to specify an instruction that will make the user escape from the window. Hence waitKey() is compared with the ord() of the desired characteristics that must be press to escape. In this case, the way to escape is by pressing the key ‘e’.
Note: ord(char) takes a char as a parameter and returns its ASCII value.
Output:

Now,
For detection of objects from the frame, it must be converted to grayscale as many operations in OpenCV are done through grayscale.
The method used for conversion is cv2.cvtColor().
gray = cv2.cvtColor(frame, cv2.COLOR_BGR2GRAY)cvtColor() takes two compulsory parameters:
1. source and
2. color space conversion code -> specifies from which color system to which the source has to convert.
Now, if we display the gray instead of the frame, we can see the gray camera mode.
cap = cv2.VideoCapture(0)

while True:
    ret, frame = cap.read()
    frame = cv2.cvtColor(frame, cv2.COLOR_BGR2GRAY)
    cv2.imshow('Frame', frame)
    if(cv2.waitKey(1) == ord('e')):
        break
cap.release()
cap.destroyAllWindows()
Output:

After face detection, the program must specify a rectangle or circle or eclipse any shape you desire to differ face from other objects.
Let’s see how to draw shapes with openCV in video capture:
img = cv2.rectangle(img, (300, 300), (200, 200), (134, 56, 132), 6)cv2.rectangle() draws rectangle over the image/ video capture i.e. over the source and takes parameters as
1. source
2. starting point co-ordinates
3. ending point co-ordinates
4. color value (RGB)
5. thickness in px (-1 to fill)
Output:

You can see the rectangle over the image. Similarly, you can draw lines, eclipse, circles and can put the text as well!
For object detection, OpenCV has various classifiers. The object passed through the corresponding classifiers and returns the detected result if any. OpenCV has a ‘Haar Cascade Classifier’ which classifies eyes, face, upper body, etc
This classifier has corresponding XML files that must be passed through CascadeClassifier() as:
#path for face cascade, path where it is stored specific classifier

face_cascade = cv2.CascadeClassifier(cv2.data.haarcascades + 'haarcascade_frontalface_default.xml')
How will we detect face then? With the help of the above Haar Cascade path and using detectMultiScale() we can store coordinates of face/faces in a tuple.
faces = face_cascade.detectMultiScale(gray, 1.3,5)detectMultiScale() takes 3 parameters:
1. image/source
2. scale factor -> specifies how much the image size is reduced at each image scale.
3. min Neighbors ->Parameter specifying how many neighbors each candidate rectangle should have to retain it.
Let’s dive into the main program by assembling these little functions that we learned:
import cv2
import numpy as np

cap=cv2.VideoCapture(0)


face_cascade = cv2.CascadeClassifier(cv2.data.haarcascades + 'haarcascade_frontalface_default.xml')

while True:
    ret,frame = cap.read()

    gray = cv2.cvtColor(frame, cv2.COLOR_BGR2GRAY)

    faces = face_cascade.detectMultiScale(gray, 1.3,5)

    for (x,y,w,h) in faces:
        cv2.rectangle(frame,(x,y),(x+w,y+h),(255,0,0),5)


    cv2.imshow('frame',frame)

    if(cv2.waitKey(1)==ord('e')):
        break

cap.release()
cv2.destroyAllWindows()
Output:

That’s it!
Now it can also detect eyes just include Haar cascade eyes classifier as:
import  numpy as np
import cv2

cap=cv2.VideoCapture(0)

face_cascade = cv2.CascadeClassifier(cv2.data.haarcascades + 'haarcascade_frontalface_default.xml')
eye_cascade = cv2.CascadeClassifier(cv2.data.haarcascades + 'haarcascade_eye.xml')

while True:
    ret,frame = cap.read()

    gray = cv2.cvtColor(frame, cv2.COLOR_BGR2GRAY)

    faces = face_cascade.detectMultiScale(gray, 1.3,5)

    for (x,y,w,h) in faces:
        cv2.rectangle(frame,(x,y),(x+w,y+h),(255,0,0),5)

        roi_gray = gray[y:y+w,x:x+w]
        roi_color = frame[y:y+h,x:x+w]

        eyes= eye_cascade.detectMultiScale(roi_gray,1.3,5)

        for (ex,ey,ew,eh) in eyes:
            cv2.rectangle(roi_color,(ex,ey),(ex+ew,ey+eh),(0,255,0),5)

    cv2.imshow('frame',frame)

    if(cv2.waitKey(1)==ord('q')):
        break

cap.release()
cv2.destroyAllWindows()
To detect eyes sharp and clear, what has been done here is, region_of_interest, ROI variable has made so that only the face region is passed through eye_cascade.detectMultiScale and then the rectangles for eyes have drawn on the actual frame image.
Let’s detect eyes and faces from an mp4 video. Include mp4 instead of camera id.
Just add mp4/img file path inside VideoCapture() and that’s it.
cap = cv2.VideoCapture('video.mp4')Output:
Here, the blue rectangle denotes the faces and the green one denotes the eyes.
That’s the end for Face and Eye Detection using OpenCV – Python!
You can really play around with this imaging array and video files using NumPy functions. Do try!
For more information about OpenCV- Python and its functions, you can refer to: https://docs.opencv.org/master/d6/d00/tutorial_py_root.html
For HaarCascade Github: https://github.com/opencv/opencv/tree/master/data/haarcascades
Thank you for climbing here!
Also Read:
- You Can Now Run AI Fully Offline on Your Phone — Google’s Gemma 4 Just Changed Everything
- I Built a 24×7 AI Blogging System for WordPress Using Python (Free) — Full Code Inside
- This Reddit User “Hacked” AI With Simple Tricks… And The Results Are Insane
- One “rm -rf” Command Almost Wiped Out $100 Million Worth of Toy Story 2
- How to Make Money with ChatGPT in 2026: A Real Guide That Still Works
- PicoClaw vs OpenClaw: The Tiny AI That Could Replace Powerful AI Agents
- Oracle Layoffs 2026: People Woke Up to an Email… and Lost Their Jobs Instantly
- X’s New Video Update Is Breaking a Basic Feature — And Users Are Not Happy
- The Most Shocking Military Tech Yet: Robot Soldiers That Could Change Warfare Forever
- Sora Shutdown: The Reality Check That Shook AI Video — And What Comes Next
- Aya Expanse supports multiple languages for diverse global applications
- Alibaba releases Page Agent on GitHub for public access
- Google Sheets Gemini reaches new levels of performance and accuracy
- Artificial intelligence boosts cardiac care in rural Australian communities
- NVIDIA GTC 2026 Offers Insights into Future Artificial Intelligence Developments