
What if we say that we can also use Python for making amazing graphics, designs, animations and games too. Making amazing graphics using a programming language is amazing but what’s more amazing is creating those graphics automatically; just by writing some lines of code. Today we will rub our hands-on Beginners to Advanced Python Turtle Projects.
In this article, we’ll learn the basics of the turtle library, how to programme with the Python turtle library, and turtle commands, and will definitely learn how to make Beginners to Advanced Python Turtle Projects. So fasten up your belts and let’s get started.
But the question is how this is even possible. The answer is the Turtle library.
What we are going to learn?
- What is turtle library?
- turtle library overview
- Basic functions and turtle movements.
- Drawing various shapes and designs.
What is Python turtle Library?
Turtle is a Python library for creating graphics, images, and games. It has a feature similar to a drawing board that allows users to draw pictures and shapes. Turtle programming is also known as LOGO programming. This library is widely recommended for someone who is getting started in design programming.
Python turtle Overview:
As mentioned earlier turtle is a library and so there’s no need to install anything extra. We can simply use the library just by using the import statement and the name of the library. This library contains various predefined methods and functions that are very useful when creating graphics using turtle.
Use the below command to import the turtle library:
import turtle After importing the library, we need to have a screen wherein we can design and implement our animations. This can be done by using a variable that stores a turtle function named getscreen()
sc = turtle.getscreen() Output:

And now, we will declare a variable that will store the turtle and we will use this variable throughout the program to access functions, methods etc that are in the turtle library.
tp = turtle.Turtle()When it comes to programming with the Python turtle library, the very first thing that we’ll learn is how to make the turtle move in the direction we want it to go and eventually make different shapes and designs. After that, we’ll discover how to customize our turtle and its surroundings. Finally, we’ll learn a few extra commands that will allow you to get familiar with turtle programming and will help you in projects.
Function used and turtle movements:
Designing without moving the turtle is simply not possible and so in order to move the turtle we need a way to get that done and so there are predefined functions that ship with the turtle library.
- forward(): This function provides the accessibility to move the turtle in the forward direction.
- backward(): This function helps the users to move the turtle in the backward direction.
- left(): This moves the turtle in the left direction.
- right(): This function moves the turtle in the right direction.
There are amazing shorthands also available for the above functions. They are fd for forward, bk for backward, rt for right and lt for left.
Beginners to Advanced Python Turtle Projects drawing various shapes and designs:
Now moving ahead in Beginners to Advanced Python Turtle Projects, let us dive deeper into making projects. We will start with making basic shapes like squares, circles, rectangles, and triangles and then we will move ahead to make some amazing and totally unique colourful designs.
(1) Beginner’s Level:
(A) Drawing a Square:
import turtle
tp = turtle.Turtle()
tp.fd(100)
tp.rt(90)
tp.fd(100)
tp.rt(90)
tp.fd(100)
tp.rt(90)
tp.fd(100)
Output:

Explanation: As the square consists of 4 lines, each connected at a 90-degree angle, in this we have made use of all the forward and right functions.
tp.fd(100): moves the turtle 100 units in to forward direction.
tp.rt(90): turns the turtle 90 degrees to the right.
In the same way, the rest of the command executes and produces the result.
(B) Drawing a Rectangle:
import turtle
tp = turtle.Turtle()
tp.fd(300)
tp.rt(90)
tp.fd(150)
tp.rt(90)
tp.fd(300)
tp.rt(90)
tp.fd(150)
tp.rt(90)
Output:
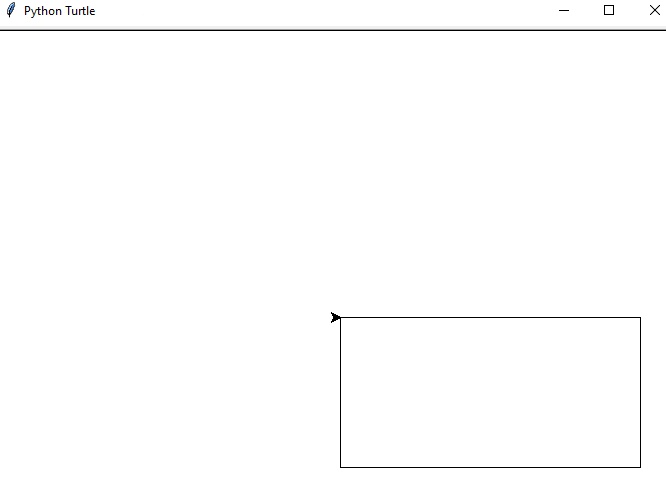
Explanation: The rectangle consists of 4 lines, each connected at a 90-degree angle, but the adjacent sides have different lengths. We have used forward and right functions.
tp.fd(300): moves the turtle 300 units in to forward direction.
tp.rt(90): turns the turtle 90 degrees to the right.
tp.fd(150): moves the turtle 150 units in to forward direction. This is 150 because all the sides in the rectangle are not equal, only the opposite ones are equal.
In the same way, the rest of the command executes and produces the result.
(C) Drawing a Triangle:
import turtle
tp = turtle.Turtle()
tp.fd(100)
tp.lt(120)
tp.fd(100)
tp.lt(120)
tp.fd(100)
Output:

Explanation: The above code is for the equivalent triangle and all its sides are equal. In this, we have made use of all the forward and left functions.
tp.fd(100): moves the turtle 100 units in to forward direction.
tp.lt(120): turns the turtle 120 degrees to the left.
In the same way, the rest of the command executes and produces the result.
(D) Drawing a Circle:
import turtle
tp = turtle.Turtle()
tp.circle(50)
Output:

Explanation: Turtle library provides a function named circle() to draw circles. The argument that it takes is simply the radius of the circle.
tp.circle(50): Here we have passed the radius as 50 units in the circle function.
(2) Intermediate Level:
Now let us start with the Intermediate level of designs as a part of our article on Beginners to Advanced Python Turtle Projects.
(A) Custom Designs:
Now suppose that you want to make a custom-designed shape whether it is square, rectangle or circle, how will you do that? Wait. The solution is way more simple. We all know the turtle library ships with a lot of built-in functions which makes our task easier.
For custom designs, we can use various built-in turtle library functions such as: color(), fillcolor(), pensize(), pencolor(), speed() and many more.
Using these functions, we are going to make a custom circle wherein the user can change the colour of the circle, give it a border and add colour to it.
import turtle
tp = turtle.Turtle()
tp.pencolor("purple")
tp.fillcolor("orange")
tp.pensize(8)
tp.speed(5)
tp.begin_fill()
tp.circle(110)
turtle.bgcolor("blue")
tp.end_fill()
Output:

Explanation: The methods used are pencolor(), fillcolor(), pensize(), speed(), begin_fill() and end_fill().
pencolor(): This method helps the user in changing the colour of the pen. It takes in the arguments in the form of colour strings or in RGB colour codes. The default colour of the ink is black and so if no arguments are passed, the ink colour will be black.
So here, we used pencolor(“purple”). This will set the colour of the ink to purple.
fillcolor(): As the name itself suggests, this method is used to fill the colour in the design. Here as we have passed the argument “orange” to the fillcolor method, it will fill the interior of the shape with orange colour.
pensize(): This method helps us to set the width of the pen. It takes the arguments in the form of width.
We have passed “5” to this function and hence the width of the pen or outline will be 5 units.
speed(): This simply decides how fast or slow the turtle will move based on the arguments passed. The speed lies in between the range of 1-10.
1 is considered to be the slowest, 6 as the normal speed and 10 as the fastest.
begin_fill(): Whenever there’s a need to fill any shape, this method should be called before the shape. No arguments are accepted.
bgcolor(): This helps in changing the background colour. Here we have passed blue colour
end_fill(): Used to actually fill the shape.
(B) Circles inside a circle:
Basically, we want to make a circle inside a bigger circle and then a circle inside the second biggest circle and so on. How will you do this? There are multiple ways but the best one is using the loops. Let’s study the use case of loops in our turtle programming.
i=5
while i <= 55:
    tp.circle(i)
    i = i+10
Output:

Explanation: How simple this was then it when you read the problem statement? We haven’t used a single complicated line of code.
Line 1: We declared a variable “i” and set its value to 5. Here “i” is the radius of the circle drawn.
Line 2: We have used a while loop with a condition that “i” should be less than or equal to 85.
Line 3: Here we have used the circle() function to draw the circle. We have passed “i” as the argument.
Line 4: And in the last line, after each loop, we are incrementing the value of “i” (radius) with 10.
Once the value of “i” is set to 85 the loop is terminated and the required design is printed.
(C) Drawing a multi-coloured star:
Now let’s code for the colourful star.
import turtle
import time
screen=turtle.Screen()
tp=turtle.Turtle()
screen.setup(420,320)
screen.bgcolor('black')
colour_set=['red','green','blue','yellow','purple']
tp.pensize(4)
tp.penup()
tp.setpos(-90,30)
tp.pendown()
for i in range(5):
     tp.pencolor(colour_set[i])
     tp.forward(200)
     tp.right(144)
tp.penup()
tp.setpos(80,-140)
tp.pendown()
tp.ht()
Output:

Explanation: Multicoloured star is ready. We used various new functions and methods in this design. Let’s decode each line in detail.
Line 1 to 4: Basic turtle library importing, storing turtle in variable etc.
Line 5: This is used to set the size of the design. Here we have passed two arguments, width and height, 420 and 320 respectively.
Line 6: To set the background colour of the screen to black, we have used bgcolor().
Line 7: This is an array of colours named colour_set. The colours that we want in our star.
Line 8: pensize(4) will set the width of the pen to 4.
Line 9: penup() helps the user to pick up the pen. Many times we want to pick up the pen and don’t want to leave extra lines on the screen and so penup() is used.
Line 10: setpos(-90,30) will move the turtle to the desired position, It takes 2 arguments which are basically in the form of x and y coordinates.
Line 11: pendown() is the default state of the turtle. With this command, we can assure that the turtle is ready to draw.
Line 12: In this line, we have initialized a for a loop. This is done in order to make the sides of the star.
Line 13: tp.pencolor(colour_set[i]) this will access the first element from the colour_set array and it will act as an argument to the method pencolor().
Line 14: tp.forward(200) will move the turtle in the forwarding direction by 200 units.
Line 15: tp.right(144) will move the turtle by 144 degrees towards the right.
LIne 16 to 18: Here we again used penup(), set the turtle position to x = 80 and y = -140 and finally used pendown().
Line 19: tp.ht() this is used to hide the turtle and that will eventually make our design more attractive by hiding unwanted things.
(3) Advanced Level:
Advanced-level turtle programming involves more usage of conditionals, loops etc. Whenever there’s a need of making recurring design patterns or game conditionals, loops are widely used.
So far we have learnt how to make basic shapes, then some intermediate-level designs in this article of Beginners to Advanced Turtle Projects and now are the time to finally use the turtle for which it is famous; game development. Let us make a unique game using the turtle library.
(A) Whose turtle is faster?
The aim of this game is to show two turtles and the specific targets that they have to reach. This will be a two-player game, wherein each user will roll a die and the turtle will move that number of steps and the same goes for the second player. The game will end once any one of the players reaches the target destination.
Getting started:
Step 1: Set up the game environment and import the required library
Step 2: Working on the designing part which is the turtles and the target destination.
Step 3: Coding for the logical part. How and when the turtle should move, the winning criteria etc
Step 1: Setting up the environment and importing the library
import turtle
import random
Explanation: Here we have imported two libraries namely turtle and random. The turtle library will help us in the designing part whereas the random library will help in building the logical part of the game.
the random library helps in picking random elements by providing various functions that are capable of performing such operations.
Step 2: Working on the designing part
In this step, we have to create two turtles and their destination i.e a circle. The colour of both the turtle should be different and their destination should match that respective colour.
Code for two turtles:
p_one = turtle.Turtle()
p_one.color("purple")
p_one.shape("turtle")
p_one.penup()
p_one.goto(-200,100)
p_two = p_one.clone()
p_two.color("orange")
p_two.penup()
p_two.goto(-200,-100)
Explanation: We used a purple colour for player 1 and an orange colour for player 2.
p_one.shape(“turtle”): This function shape() sets the turtle shape to the one that is passed as an argument.
p_one.goto(-200,100): This will set the position of the turtle at x = -200 and y = 100
p_one.clone(): This method simply copies the characteristics of the p_one turtle. Player two’s turtle was made by cloning player one’s turtle, changing its colour, and moving it to a new starting place.
Please note that once the turtles have been formed, we must set them in their beginning places and ensure that they are aligned.
We must now create houses for the turtles. These houses will serve as the turtles’ destinations. A circle will represent each of the turtles’ houses. We must ensure that both destinations are equidistant from the starting point in this case:
Code for destinations:
p_one.goto(300,60)
p_one.pendown()
p_one.circle(40)
p_one.penup()
p_one.goto(-200,100)
p_two.goto(300,-140)
p_two.pendown()
p_two.circle(40)
p_two.penup()
p_two.goto(-200,-100)
Explanation: For the designing of two destinations, we have made use of a circle(). To set the position of the destinations we made use of the goto() method.
Step 3: Coding for the logical part.
It’s time to start working on the rest of the game’s programming. Because we’ll be using loops and conditional expressions, pay attention to the indentations and spaces. This process is repeated until one of the turtles achieves the target, at which point the programme ends. The following is an example of the code:
die = [1,2,3,4,5,6]
for i in range(20):
    if p_one.pos() >= (300,100):
            print("Player One Wins!")
            break
    elif p_two.pos() >= (300,-100):
            print("Player Two Wins!")
            break
    else:
            p_one_turn = input("Press 'Enter' to roll the die ")
            die_outcome = random.choice(die)
            print("Result of the die roll is: ")
            print(die_outcome)
            print("Number of steps will be: ")
            print(20*die_outcome)
            p_one.fd(20*die_outcome)
            p_two_turn = input("Press 'Enter' to roll the die ")
            die_outcome = random.choice(die)
            print("Result of the die roll is: ")
            print(die_outcome)
            print("Number of steps will be: ")
            print(20*die_outcome)
            p_two.fd(20*die_outcome)
Explanation:
Line 1: This line is a variable that is listed and it stores the numbers ranging from 1-6.
Line 2: This line of code represents the for loop that will run in the range of 1 to 20.
Lines 3 to 8: These lines check for the player’s status which is won or lost. Based on the position of the loop it is decided whether to terminate the loop or not. If the specified condition is reached then the loop breaks and prints the statements.
Line 9: If no player has won then the flow of the code moves to the else statement.
Line 10: Requests the user by printing a statement to take a turn by pressing Enter key.
Line 11: Selects a random element from the die list and assigns the value to the variable die_outcome.
Line 12: This line prints the line “Result of the die roll is: “
Line 13: This line prints the value stored in die_outcome
Line 14: Same as line 11.
Line 15: This is done in order to decrease the number of steps required.
Line 16: Take the turtle in the forwarding direction.
Line 17 to 23: These lines are the same for player 2. The same functionalities need to be applied to
player 2.
The for loop continues its flow till any one of the players reaches the destination.
Finally, here’s the end of our game project. Try to add new functionalities to this game. Make the UI look good, add background colour, add images, change the speed of the turtle etc. This library is all one needs to develop amazing projects.
Explore more by reading the official documentation: Python Turtle Library
In this article, you learnt how to programme with the Python turtle library and gained a solid understanding of certain fundamental programming ideas this session. We hope this article on Beginners to Advanced Python Turtle Projects will help you in getting familiarized with using different functions, and methods, how to play with conditionals, use loops etc.
Thank you for visiting our website.
Also Read:
- Radha Krishna using Python Turtle
- Drawing letter A using Python Turtle
- Stickman Game in Python
- Brick Breaker Game in Python
- Wishing Happy New Year 2023 in Python Turtle
- Tank game in Python
- GUI Piano in Python
- Ludo Game in Python
- Rock Paper Scissors Game in Python
- Snake and Ladder Game in Python
- Puzzle Game in Python
- Draw Goku in Python Turtle
- Draw Mickey Mouse in Python Turtle
- Creating Dino Game in Python
- Tic Tac Toe Game in Python
- Happy Diwali in Python Turtle
- Draw Halloween in Python Turtle
- Write Happy Halloween in Python Turtle
- Draw Happy Diwali in Python Turtle
- Tetris game in Python Code
- Extract Audio from Video using Python
- Drawing Application in Python Tkinter
- Draw Flag of USA using Python Turtle
- Draw Iron Man Face with Python Turtle: Tony Stark Face
- Draw TikTok Logo with Python Turtle
- Python Games Code | Copy and Paste
- Draw Instagram Logo using Python Turtle
- Games in Python | Assignment Expert
- I Love You Text in ASCII Art
- Python Turtle Shapes- Square, Rectangle, Circle


