Introduction to Machine Learning
In this article, you will learn about the ML Environment Setup, Machine Learning terminology, its paradigms, and a tutorial to help you set up your machine so you can code what you learn. Before we start with our ML Environment Setup, read this article to get an overview of machine learning.
Machine Learning Terminology
When you start learning any new technology the first step is to familiarize yourself with the terminology.
- Dataset – Dataset is the core of any Machine Learning model. It is simply the collection of data required to build an ML system.
- Instances – It denotes the rows of the dataset, which means the number of entries our dataset contains.
- Features or Attributes – These are the inputs to our model. For example, in the introductory article, we used the area to predict the price in that area as our feature.
- Targets or Labels – This is what our model learns to predict. For example, in the introductory article, we used our model to predict the price, hence price was our target.
- Labeled Data – It denotes the data for which labels for the features are provided.
- Unlabelled Data – It denotes the data for which labels for the features are not provided.
- Numerical Features – These are the features that consist of numerical data i.e. int, float, etc.
- Categorical Features – These are the features that consist of categorical data. Categorial data is a type of data that can be divided into groups. For Eg: Type of Weather, Blood Group, etc.
- Regression Problem – When the model predicts numerical data. For Eg: House Price Prediction, Stock Price Prediction, etc.
- Classification Problem – When a model classifies the data into a particular class. For Eg: Image Classification, Sentiment Analysis, etc.
Machine Learning Paradigms
The three basic paradigms of machine learning are:-
Supervised Learning
A type of problem where the model is trained to map an input to an output based on the labeled dataset it was trained on.
Regression Problem: A type of problem in which the target variable has a continuous value.
Classification Problem: A type of problem in which the target variable represents a particular class.
Unsupervised Learning
A type of problem where the model is trained to find undetected patterns in an unlabelled dataset.
Clustering: Task of grouping a set of data points such that data points belonging to the same cluster are more similar than the ones in another cluster.
Dimensionality Reduction: Task of reducing the features in the dataset.
Reinforcement Learning
A type of problem deals with training an agent to take action in an environment in such a way that maximizes the cumulative reward.
Environment Setup
Now, that you’re familiar with ML let’s set up your environment so that you are able to apply what you learn via python.
Conda Environment and Jupyter Notebook
When doing ML you’ll be using many different libraries like NumPy, Pandas, etc. and it could be quite hectic to download each and every library individually. There is a solution to this you can instead download Anaconda with the help of which you can use almost all the required libraries and tools required for ML.
Anaconda is open-source software that contains Jupyter, spyder, etc that is used for large data processing, data analytics, and heavy scientific computing. Anaconda works for R and python programming languages. Package versions are managed in anaconda by the package management system called conda.
You can download Anaconda from here. There is also in-depth installation documentation which you can check out to find out how to install Anaconda. If you want a lite version of anaconda with all necessary libraries and tools then you can also install Miniconda.
Now that you have Anaconda all set let’s use a handy utility it provides us called virtual environment i.e conda environment. You can use the default conda environment called base by typing the following command in your terminal:-
#for Linux and Mac
conda activate base

#for Windows
activate base
Once you do that you can access the tools. You now need a platform to code and if you ask almost any Data Scientist they’ll give you the same answer i.e. Jupyter Notebook. Now to open the Jupyter notebook type the following command after activating your environment:-
jupyter notebook

Now to code you can create a notebook by going to New > Python as seen in the below image. And then you can code python as you do.

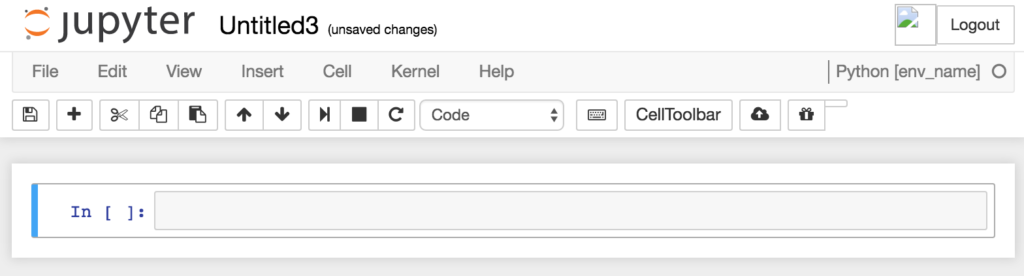
Once you do that you’ll be automatically redirected to a site in your browser, that’ll look like this. What makes jupyter special is the cells and markdown functionality that it offers. You can refer to this article in the series to learn how to use Jupyter.
And that’s you are all set to get your hands dirty with the actual coding part.
Google Colaboratory
In the previous section we learned about the Jupyter notebook setup, and now we quickly know to use Google Colab. To be precise, Colab is a free Jupyter notebook environment that runs entirely in the cloud. Most importantly, it does not require a setup and the notebooks that you create can be simultaneously edited by your team members. Colab supports many popular machine learning libraries which can be easily loaded into your notebook.
To start coding with Google Colab, go to the website and the page below will be displayed to you.

After getting started with the main page, Click on File>New Notebook to create a new notebook.

And that’s you are all set to get your hands dirty with the actual coding part with Google Colab. You can also build projects with Colab, but you need internet connectivity for that. The main advantage of using Google Colab is that you don’t require to install any software for the ML Environment Setup. If you don’t have enough disk space in your system then Google Colab is a perfect alternative to Jupyter Notebook.
Summary
In this article, we have learned about the ML Environment Setup, Machine Learning terminology, its paradigms, and a guide to help you set up your machine for getting started with Machine Learning. Hope you found this article useful! Let’s meet again with an exciting new article.
Also Read:
- Machine Learning: A Gentle Introduction
 Introduction to Machine Learning Machine Learning is probably one of the most interesting and hyped branches of computer science. The thing that separates humans from machines is the fact that humans learn from their experiences. But is it possible to make a machine learn? And The answer is Yes! It is possible through Machine Learning….
 - Machine Learning Course DescriptionBefore you start, let me give you an overview of what this series has to offer you. Our machine learning course series comprises of the following sections:- ML Environment Setup and Overview Jupyter Notebook: The Ultimate Guide Numpy Pandas Matplotlib Seaborn Sklearn Linear Regression Logistic Regression Decision Tree Random Forest Support Vector Machine K Nearest…
- ML Environment Setup and OverviewIntroduction to Machine Learning In this article, you will learn about the ML Environment Setup, Machine Learning terminology, its paradigms, and a tutorial to help you set up your machine so you can code what you learn. Before we start with our ML Environment Setup, read this article to get an overview of machine learning….
- Jupyter Notebook: The Ultimate GuideIntroduction to Jupyter Notebook Whenever one starts programming the first aim of that person is to find an IDE that suits his/her needs. In ML there are times when you’ll want to keep a check on your data after doing a change. But in code editors like Vim, Vscode, etc. you have to run your…
- Numpy For Machine Learning: A Complete GuideUp until now you’ve learned about the general idea of what ML does, set up your environment, and got to know about the working of your coding environment i.e. Jupyter Notebook. In this section, you’ll learn about a very powerful library called Numpy. We’ll learn about Numpy Array(np array for short) and operations on them,…
- Python Pandas Tutorial: A Complete Introduction for BeginnersIn the previous section, we learned about Numpy and how we can use it to load, save, and pre-process data easily by using Numpy Arrays. Now Numpy is a great library to do data preprocessing but I’d like to tell you all about another wonderful Python library called Pandas. At the end of this tutorial,…
- Matplotlib Python: A Beginner’s WalkthroughWe know how to analyze data by analyzing the statistics of the data and we’ve learned how to manipulate the data. But is statistics enough to analyze the data? Short answer, Visualization of data is necessary in order to find details that we missed that’s why Matplotlib Python is the best library to visualize data…
- Seaborn: Create Elegant PlotsIn the previous tutorial, we learned why data visualization is important and how we can create plots using matplotlib. In this tutorial, we’ll learn about another data visualization library called Seaborn, which is built on top of matplotlib. But why do we need seaborn if we have matplotlib? Using seaborn you can make plots that…
- Set up Python EnvironmentNow, it’s time to install the tools that we will use to write programs. So, we will be learning to Set up Python Environment in this article. Let’s start. 1. Installing Python first. First, we need to go to the official site of python: https://www.python.org/ Now we need to go to the downloads page of…
- Linear Regression: Your 1st Step in Machine LearningHi guys! So until now, we’ve learned about how we can use libraries to play with data. We did data analysis on a real dataset and we also learned how to visualize data. But what was the purpose behind it? Why do so many things? What are we trying to achieve? I’ll tell you all…