Introduction
The process of conversing, engaging, and/or exchanging messages through the Internet is referred to as chatting. It involves two or more people communicating via a chat-enabled service or program. Chat can be given via the Internet using text, voice, or video communication. A chat program is made up of two fundamental components: a server and a client.
A server is a computer program or hardware device that offers functionality to other programs or hardware. A client or clients are simply persons who wish to communicate with one another. Also, clients first need to connect to the server and then the server will work as a medium between clients. The chat program we’ll create will be more like a chat room than a peer-to-peer chat. As a result, numerous users can connect to the chat server and submit messages. Any message is sent to every chat user that is connected.
GUI Chat Application in Python Tkinter: Project Overview
| Project Name | GUI Chat Application in Python Tkinter |
| Abstract | This is a GUI-based chat application using which up to 5 clients can join and talk in real time. This project uses Tkinter, socket, and threading library. |
| Language/s Used: | Python |
| IDE | PyCharm and Thonny |
| Python version (Recommended): | 3.10 |
| Database: | Not required |
| Type: | Desktop Application |
| Recommended for | Final Year Students |
Creating a server for Chat Application in Python
In order to receive inbound requests from customers wishing to interact, I first constructed a chat server. I employed multithreading and plain ol’ sockets for this. It was possible to use frameworks like Twisted and SocketServer, but I felt it would be overkill for a program as straightforward as ours.
Importing Libraries
#imports
import socket
import threadingSocket: A socket looks and behaves much like a low-level file descriptor. In Unix, every I/O action is done by writing or reading a file descriptor. A file descriptor is just an integer associated with an open file and it can be a network connection, a text file, a terminal, or something else. A socket is bound to a port number so that the TCP layer can identify the application that the data is destined to be sent. On the client side, the client knows the hostname of the machine on which the server is running and the port number to which the server is listening.
To make a connection request. If everything goes well, the server accepts the connection. Upon acceptance, the server gets a new socket bound to the same local port and also has its remote and endpoint set to the address and port of the client.
Threading: Message threads are a running commentary of all the messages sent in your chat app. They appear within a group, private message, or channel. Threads appear in chat rooms, emails, and even the comment section of blogs. Learning how to master the art of threaded conversations will improve your teamwork.
Coding server.py
When a new client connects, we add it to our collection of client sockets while listening for forthcoming client connections. For each client that is connected, start a new thread that continuously monitors the client for any incoming messages and broadcasts them to all other clients. The code below establishes a TCP socket, binds it to the server IP, and then waits for incoming connections:
#imports
import socket
import threading

class ChatServer:

    clients_list = []

    last_received_message = ""

    def __init__(self):
        self.server_socket = None
        self.create_listening_server()
    #listen for incoming connection
    def create_listening_server(self):

        self.server_socket = socket.socket(socket.AF_INET, socket.SOCK_STREAM) #create a socket using TCP port and ipv4
        local_ip = '127.0.0.1'
        local_port = 10319
        # this will allow you to immediately restart a TCP server
        self.server_socket.setsockopt(socket.SOL_SOCKET, socket.SO_REUSEADDR, 1)
        # this makes the server listen to requests coming from other computers on the network
        self.server_socket.bind((local_ip, local_port))
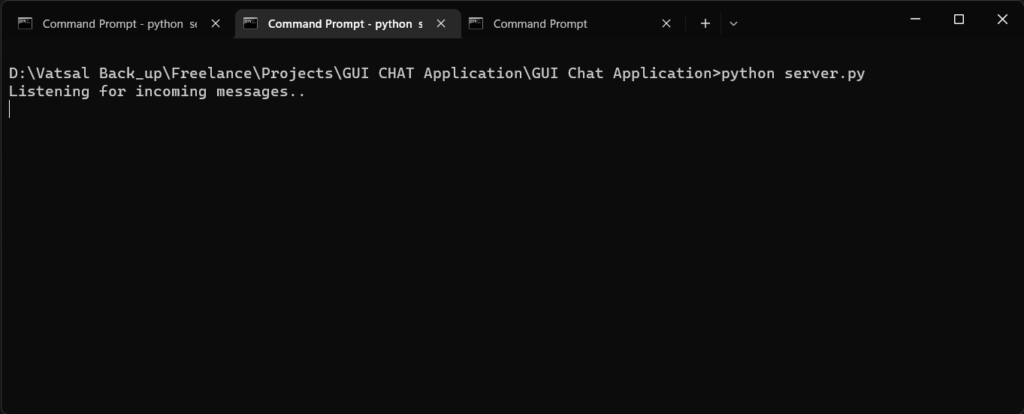
        print("Listening for incoming messages..")
        self.server_socket.listen(5) #listen for incomming connections / max 5 clients
        self.receive_messages_in_a_new_thread()
I’ve specified “127.0.0.1” as the server IP address. This includes all IPv4 addresses on the computer. You might be wondering why we don’t just use localhost or “0.0.0.0” instead. So, if the server has two IP addresses, say “192.168.1.2” on one network and “10.0.0.1” on another, it will listen on both.
Complete code for server.py:
#imports
import socket
import threading


class ChatServer:

    clients_list = []

    last_received_message = ""

    def __init__(self):
        self.server_socket = None
        self.create_listening_server()
    #listen for incoming connection
    def create_listening_server(self):

        self.server_socket = socket.socket(socket.AF_INET, socket.SOCK_STREAM) #create a socket using TCP port and ipv4
        local_ip = '127.0.0.1'
        local_port = 10319
        # this will allow you to immediately restart a TCP server
        self.server_socket.setsockopt(socket.SOL_SOCKET, socket.SO_REUSEADDR, 1)
        # this makes the server listen to requests coming from other computers on the network
        self.server_socket.bind((local_ip, local_port))
        print("Listening for incoming messages..")
        self.server_socket.listen(5) #listen for incomming connections / max 5 clients
        self.receive_messages_in_a_new_thread()
    #fun to receive new msgs
    def receive_messages(self, so):
        while True:
            incoming_buffer = so.recv(256) #initialize the buffer
            if not incoming_buffer:
                break
            self.last_received_message = incoming_buffer.decode('utf-8')
            self.broadcast_to_all_clients(so)  # send to all clients
        so.close()
    #broadcast the message to all clients
    def broadcast_to_all_clients(self, senders_socket):
        for client in self.clients_list:
            socket, (ip, port) = client
            if socket is not senders_socket:
                socket.sendall(self.last_received_message.encode('utf-8'))

    def receive_messages_in_a_new_thread(self):
        while True:
            client = so, (ip, port) = self.server_socket.accept()
            self.add_to_clients_list(client)
            print('Connected to ', ip, ':', str(port))
            t = threading.Thread(target=self.receive_messages, args=(so,))
            t.start()
    #add a new client
    def add_to_clients_list(self, client):
        if client not in self.clients_list:
            self.clients_list.append(client)


if __name__ == "__main__":
    ChatServer()
When recv() is called, it will wait for data to arrive. If no data is available, recv() will not return (it ‘blocks’) and the program pauses until data arrives. Calls like accept() and recv() that make the program wait until some new data has arrived, allowing it to return, are called blocking calls. Data is sent and received over the network as bytestrings, and hence need to be encoded and decoded using encode() and decode() respectively.
recv() takes in one argument, bufsize, which specifies the maximum amount of data to be received at once.
send(), on the other hand, sends data from the socket to its connected peer.
One problem with both send() and recv() is that there is a slight possibility that only part of the data is sent or received because the outgoing or incoming buffers are almost full, so it queues whatever data it could while leaving the rest of the data unprocessed. This becomes problematic when send() returns, but in fact, some of the data is still left unsent. We could put send() in a loop, or we could use sendall() as a simple way to say “I want to send all of the data”.
I hope I was able to explain much of the theory to you when developing the server script. The same criteria apply here, except that we have a Send thread that is always waiting for command-line user input. We will add a graphical user interface later, but it will follow much of the same philosophy. Any data received will be displayed on the client interface, and any data sent will be processed by the server to be broadcast to other connected clients.
Again, we make use of multithreading. This time, it is to let the sending and receiving operations run alongside each other. This way, our chatroom is real-time (instead of alternating between send() and recv() calls).
Coding client side for Chat Application in Python
We’re not quite finished yet, but how about creating a graphical user interface? Tkinter, which is included in the Python standard library, will be used.
We only need to make a few changes to client.py and add some extra code to construct the GUI. Reading the documentation for Tkinter will teach you more about it, but it is outside the scope of this lesson.
from tkinter import Tk, Frame, Scrollbar, Label, END, Entry, Text, VERTICAL, Button, messagebox #Tkinter Python Module for GUI
import socket #Sockets for network connection
import threading # for multiple proccess


class GUI:
    client_socket = None
    last_received_message = None

    def __init__(self, master):
        self.root = master
        self.chat_transcript_area = None
        self.name_widget = None
        self.enter_text_widget = None
        self.join_button = None
        self.initialize_socket()
        self.initialize_gui()
        self.listen_for_incoming_messages_in_a_thread()

    def initialize_socket(self):
        self.client_socket = socket.socket(socket.AF_INET, socket.SOCK_STREAM) # initialazing socket with TCP and IPv4
        remote_ip = '127.0.0.1' # IP address
        remote_port = 10319 #TCP port
        self.client_socket.connect((remote_ip, remote_port)) #connect to the remote server

    def initialize_gui(self): # GUI initializer
        self.root.title("Socket Chat")
        self.root.resizable(0, 0)
        self.display_name_section()
        self.display_chat_entry_box()
        self.display_chat_box()


    def listen_for_incoming_messages_in_a_thread(self):
        thread = threading.Thread(target=self.receive_message_from_server, args=(self.client_socket,)) # Create a thread for the send and receive in same time
        thread.start()
    #function to recieve msg
    def receive_message_from_server(self, so):
        while True:
            buffer = so.recv(256)
            if not buffer:
                break
            message = buffer.decode('utf-8')

            if "joined" in message:
                user = message.split(":")[1]
                message = user + " has joined"
                self.chat_transcript_area.insert('end', message + '\n')
                self.chat_transcript_area.yview(END)
            else:
                self.chat_transcript_area.insert('end', message + '\n')
                self.chat_transcript_area.yview(END)

        so.close()

    def display_name_section(self):
        frame = Frame()
        Label(frame, text='Enter Your Name Here! ', font=("arial", 13,"bold")).pack(side='left', pady=20)
        self.name_widget = Entry(frame, width=60,font=("arial", 13))
        self.name_widget.pack(side='left', anchor='e',  pady=15)
        self.join_button = Button(frame, text="Join", width=10, command=self.on_join).pack(side='right',padx=5, pady=15)
        frame.pack(side='top', anchor='nw')

    def display_chat_box(self):
        frame = Frame()
        Label(frame, text='Chat Box', font=("arial", 12,"bold")).pack(side='top', padx=270)
        self.chat_transcript_area = Text(frame, width=60, height=10, font=("arial", 12))
        scrollbar = Scrollbar(frame, command=self.chat_transcript_area.yview, orient=VERTICAL)
        self.chat_transcript_area.config(yscrollcommand=scrollbar.set)
        self.chat_transcript_area.bind('<KeyPress>', lambda e: 'break')
        self.chat_transcript_area.pack(side='left', padx=15, pady=10)
        scrollbar.pack(side='right', fill='y',padx=1)
        frame.pack(side='left')

    def display_chat_entry_box(self):
        frame = Frame()
        Label(frame, text='Enter Your Message Here!', font=("arial", 12,"bold")).pack(side='top', anchor='w', padx=120)
        self.enter_text_widget = Text(frame, width=50, height=10, font=("arial", 12))
        self.enter_text_widget.pack(side='left', pady=10, padx=10)
        self.enter_text_widget.bind('<Return>', self.on_enter_key_pressed)
        frame.pack(side='left')

    def on_join(self):
        if len(self.name_widget.get()) == 0:
            messagebox.showerror(
                "Enter your name", "Enter your name to send a message")
            return
        self.name_widget.config(state='disabled')
        self.client_socket.send(("joined:" + self.name_widget.get()).encode('utf-8'))

    def on_enter_key_pressed(self, event):
        if len(self.name_widget.get()) == 0:
            messagebox.showerror("Enter your name", "Enter your name to send a message")
            return
        self.send_chat()
        self.clear_text()

    def clear_text(self):
        self.enter_text_widget.delete(1.0, 'end')

    def send_chat(self):
        senders_name = self.name_widget.get().strip() + ": "
        data = self.enter_text_widget.get(1.0, 'end').strip()
        message = (senders_name + data).encode('utf-8')
        self.chat_transcript_area.insert('end', message.decode('utf-8') + '\n')
        self.chat_transcript_area.yview(END)
        self.client_socket.send(message)
        self.enter_text_widget.delete(1.0, 'end')
        return 'break'

    def on_close_window(self):
        if messagebox.askokcancel("Quit", "Do you want to quit?"):
            self.root.destroy()
            self.client_socket.close()
            exit(0)

#the mail function
if __name__ == '__main__':
    root = Tk()
    gui = GUI(root)
    root.protocol("WM_DELETE_WINDOW", gui.on_close_window)
    root.mainloop()
Steps to run GUI Chat Application in Python:
Debug the server.py file first, then execute client.py. The GUI will appear after executing client.py! You can have up to 5 clients.
I developed this so that you can interact with the program through the GUI, making it easy to debug and observe what is going on behind the scenes.
Step.1: Run server.Py

Step.2: Run Client.py
Then GUI Will Pop up!
Step.3: Run client.py again in a new terminal
Step.4: Start chatting
Conclusion
We have created GUI Chat Application in Python Tkinter from scratch. We created two important Python files client.py and server.py. Client file has been created for the chat interface and the server file will handle the backend. That’s it. I sincerely hope you liked reading it as much as I did writing it. This was only the tip of the iceberg in the fascinating field of computer networking.
Also Read:
- Create your own ChatGPT with Python
- Bakery Management System in Python | Class 12 Project
- SQLite | CRUD Operations in Python
- Event Management System Project in Python
- Ticket Booking and Management in Python
- Hostel Management System Project in Python
- Sales Management System Project in Python
- Bank Management System Project in C++
- Python Download File from URL | 4 Methods
- Python Programming Examples | Fundamental Programs in Python
- Spell Checker in Python
- Portfolio Management System in Python
- Stickman Game in Python
- Contact Book project in Python
- Loan Management System Project in Python
- Cab Booking System in Python
- Brick Breaker Game in Python
- Tank game in Python
- GUI Piano in Python
- Ludo Game in Python
- Rock Paper Scissors Game in Python
- Snake and Ladder Game in Python
- Puzzle Game in Python
- Medical Store Management System Project in Python
- Creating Dino Game in Python
- Tic Tac Toe Game in Python
- Test Typing Speed using Python App
- MoviePy: Python Video Editing Library
- Scientific Calculator in Python
- GUI To-Do List App in Python Tkinter
